
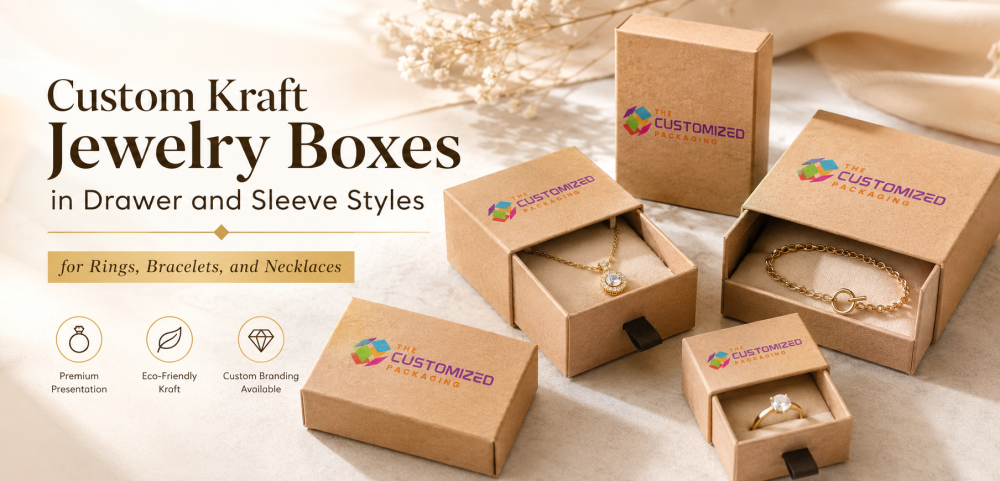
How to Design Kraft Drawer and Sleeve Jewelry Boxes for Rings, Bracelets and Necklaces
Rings, bracelets and necklaces can all use kraft drawer-and-sleeve packaging, but they need different tray proportions and interior support. Learn how to adapt the same sliding-box concept to each jewelry type while keeping a consistent collection.
 Published June 29, 2026
Updated August 31, 2026
13 min read
A ring, bracelet and necklace can all be presented in a sliding jewelry box, but they should not simply be placed into different sizes of the same generic tray.
Each product behaves differently.
A ring needs height around the setting. A bracelet needs space to maintain its natural shape. A necklace requires control over the chain while keeping the pendant centered.
Well-designed kraft drawer jewelry boxes use the same basic sleeve-and-tray concept while adapting the proportions, insert and opening experience to the jewelry inside.
This makes drawer packaging useful for brands that want a coordinated jewelry collection without forcing every product into an identical box.
How Does a Kraft Drawer Jewelry Box Work?
A drawer-style jewelry box has two primary components:
-
An outer sleeve
-
A sliding inner tray
The sleeve surrounds the tray and creates the closed exterior of the package. The tray carries the jewelry and its supporting insert.
When the tray slides outward, the jewelry is revealed gradually instead of becoming visible immediately after lifting a lid.
That controlled opening is one of the main characteristics of drawer and sleeve jewelry packaging.
The structure can be developed from folding paperboard for a lighter presentation or built with a more substantial wrapped construction when additional rigidity is required.
Regardless of construction, the movement between the sleeve and tray needs to feel deliberate and consistent.
The Sleeve and Tray Must Work as One Structure
A drawer box depends on the relationship between two separate components.
If the tray is too small for the sleeve, it can move excessively or slide out unintentionally. If the fit is too tight, the customer may have to pull too hard to open the box.
The sleeve therefore needs enough clearance for smooth movement while still controlling the tray.
This becomes especially important after the jewelry and insert are added.
A loaded necklace tray may behave differently from an empty sample. A heavier bracelet insert can also change how the drawer feels when it is opened.
The complete package should be tested with the actual product weight inside.
Rings Need a Compact Tray With Vertical Clearance
Ring packaging usually requires the smallest footprint of the three jewelry types, but the internal height can be critical.
A ring with a raised stone or decorative setting needs enough space above the insert so the product does not contact the sleeve when the tray is pushed closed.
The insert should hold the band firmly enough to keep the setting upright.
If the slot is too loose, the ring can rotate as the drawer moves. If the ring sits too deeply, the setting may lose visual prominence when the tray opens.
Ring Drawer Design Priorities
For a ring, focus on:
-
Keeping the setting centered
-
Maintaining an upright presentation
-
Allowing enough clearance above raised stones
-
Preventing rotation during drawer movement
-
Leaving enough room for comfortable removal
The box should frame the ring closely without making the presentation feel cramped.
Ring Inserts Should Control the Band, Not the Stone
A good ring holder secures the product through the band while leaving the main decorative feature visible.
The insert can use a narrow slot, folded paper support or another fitted holding method depending on the product and presentation.
The important point is that the stone or setting should not be used as the main pressure point.
For rings with taller settings, the insert depth and tray height should be evaluated together.
The correct fit should allow the drawer to close smoothly without the jewelry touching the inside of the sleeve.
Bracelets Need More Horizontal Space
Bracelets use the same drawer concept differently because the jewelry occupies a wider area.
Fine chain bracelets can be presented in a horizontal line or gentle curve. Bangles and cuffs may require a wider tray that allows the circular form to remain visible.
Charm bracelets need enough room so individual elements do not overlap excessively.
The kraft bracelet drawer box should therefore be designed around the bracelet's natural presentation rather than simply increasing the dimensions of a ring box.
Bracelet Drawer Design Priorities
Consider:
-
Bracelet length or diameter
Clasp position
Charm placement
Width of cuffs or bangles
Product thickness
Space required for removal
The visual centerpiece of the bracelet should remain easy to see when the tray is opened.
Keep Bracelet Clasps and Extensions Under Control
Fine bracelets often include an extension chain or clasp that is less visually important than the decorative front.
Allowing those components to lie freely inside the tray can make the presentation look disorganized.
A fitted support can hold the main section in position while directing the clasp or excess chain toward a less visible area.
For bangles and cuffs, the challenge is different.
These products need support around their natural shape without being forced into a smaller curve simply to fit the box.
The box proportions should follow the jewelry.
Necklaces Need the Largest Display Area
A necklace generally needs more interior surface than a ring or bracelet because the chain and pendant need to be arranged together.
The pendant should usually become the visual center of the tray.
Attachment points near the upper area can guide the chain downward while excess length is directed behind or beneath the display surface.
This keeps the chain from collecting around the pendant.
Necklace Drawer Design Priorities
A kraft necklace drawer box should account for:
-
Total displayed chain length
-
Pendant dimensions
-
Pendant thickness
-
Chain attachment points
-
Excess chain storage
-
Clasp position
-
Product removal
The objective is to make the necklace appear intentionally arranged as soon as the drawer is opened.
Hide Excess Necklace Chain Without Making Removal Difficult
A clean necklace display often requires part of the chain to disappear behind the insert.
That concealed space needs to be large enough for the excess chain without creating a visible bulge or making the jewelry difficult to remove.
The customer should be able to understand where the chain releases and lift the necklace without pulling against tight slots.
Testing is particularly important with delicate chains because a system that holds the necklace securely can still be too restrictive during removal.
Compare the Three Jewelry Layouts
The same drawer-and-sleeve idea changes considerably depending on the product.
| Jewelry Type | Tray Shape | Main Insert Function | Critical Clearance |
|---|---|---|---|
| Ring | Compact square or rectangle | Hold band upright | Height above setting |
| Fine bracelet | Long or medium rectangle | Control chain and clasp | Space around attachments |
| Bangle or cuff | Wider tray | Preserve curved form | Side and top clearance |
| Necklace | Longer or broader rectangle | Center pendant and manage chain | Pendant depth and chain storage |
This is why simply selecting a standard drawer box and adding a generic insert can create presentation problems.
The interior layout should be established before the final exterior dimensions are confirmed.
Can Rings, Bracelets and Necklaces Share One Box Size?
Sometimes.
A shared outer size can be useful when several jewelry products have compatible dimensions. Different inserts can then transform the same tray format for different products.
For example, one medium box might support:
-
A bracelet with a horizontal insert
-
A pendant necklace with chain-control points
-
A small jewelry set with divided positions
A very compact ring, however, may look lost in the same box.
Standardizing dimensions only makes sense when product presentation remains strong.
The goal should be a coordinated packaging system, not forcing every piece into one footprint.
Use Shared Dimensions Strategically
When several products can genuinely use the same outer structure, a shared sleeve-and-tray format can create a more unified jewelry collection.
The sleeve can maintain consistent brand positioning while the insert changes according to the product.
This may work particularly well for:
-
Coordinated jewelry collections
-
Multiple pendant designs
-
Similar bracelet styles
-
Earrings and small pendants
-
Gift sets using related dimensions
The packaging should still make each product feel properly fitted.
Consistency is valuable only when it does not compromise presentation.
Keep the Kraft Sleeve Visually Consistent
One advantage of a drawer structure is that the exterior sleeve provides a clear, uninterrupted branding surface.
Across a jewelry collection, the sleeve can maintain the same visual system even when the tray dimensions vary.
Brand consistency can come from:
-
Logo position
-
Typography
-
Exterior tone
-
Artwork placement
-
Collection naming
-
Repeated graphic details
The tray or interior can then change according to the jewelry.
This allows ring, bracelet and necklace packaging to look related without becoming identical.
Decide How the Customer Will Open the Drawer
A drawer needs an intentional opening point.
Common approaches include a thumb notch, pull tab or ribbon pull.
The choice should suit the weight of the loaded tray and the overall presentation.
Thumb Notch
A thumb notch keeps the structure visually simple and allows the customer to grip the tray directly.
It can work well when the design is intended to remain clean and paper-focused.
Pull Tab
A paper or fabric tab creates a defined opening point without requiring a long ribbon.
The tab needs enough strength for repeated opening.
Ribbon Pull
A ribbon pull can create a softer, gift-oriented presentation.
The ribbon should be positioned so that the customer naturally pulls the drawer straight outward rather than twisting the tray inside the sleeve.
Whatever method is used, opening should feel easy without allowing the tray to slide out unexpectedly.
Check Drawer Direction Against the Jewelry Layout
The direction in which the tray opens can affect the first view of the product.
For example, a necklace should not shift toward one end every time the drawer is pulled. A ring should remain facing the intended direction throughout the opening motion.
The insert should therefore be designed with the movement of the box in mind.
This detail is easy to overlook when the package is evaluated only while stationary.
The product should be tested by repeatedly opening and closing the completed sample.
Keep the Insert Below the Sleeve Opening
The jewelry and insert should not interfere with the sleeve as the tray moves.
Raised ring settings, bracelet charms and necklace pendants can extend above the insert surface.
Enough vertical clearance must remain between the highest point of the product and the interior of the sleeve.
This is particularly important with gemstone rings, thick pendants, raised bracelet elements and bulky clasps.
The required box depth should therefore come from the jewelry's tallest displayed point rather than from the insert alone.
Design the Reveal Before Finalizing the Exterior
A drawer box creates a sequence.
First the customer sees the exterior sleeve. Then the tray begins to emerge. Finally the complete jewelry presentation becomes visible.
Brands can use this sequence deliberately.
For example, the sleeve may remain minimal while the inner tray introduces a contrasting tone. A natural kraft exterior can reveal a darker or lighter interior that helps the jewelry stand out.
The reveal should support the product rather than distract from it.
When the drawer reaches its open position, the jewelry should immediately become the strongest visual element.
Keep Jewelry Easy to Remove
Secure positioning should not make the product difficult to access.
A customer should be able to lift a ring without forcing it from the slot, remove a bracelet without pulling its chain, and release a necklace without searching for hidden attachment points.
Before finalizing the insert, test:
-
How the customer finds the release point
-
Whether fingers can reach the jewelry comfortably
-
Whether chains catch on the insert
-
Whether the product can be returned to the box
-
Whether repeated removal damages the support
Packaging can be visually attractive and still create a poor experience if the jewelry is frustrating to remove.
Test the Drawer With the Actual Jewelry
The final assessment should use the real product or a production-representative sample.
Drawer and Sleeve Jewelry Box Checklist
-
Confirm the tray slides smoothly inside the sleeve
-
Make sure the loaded drawer does not open by itself
-
Check that the product remains centered during movement
-
Test clearance above the jewelry
-
Make sure rings stay upright
-
Confirm bracelet clasps and extensions remain controlled
-
Check that necklace pendants stay centered
-
Make sure excess necklace chain remains concealed
-
Test the opening feature several times
-
Confirm the jewelry is easy to remove
-
Check that the sleeve does not scrape the product or insert
-
Compare different box sizes together as one collection
Testing the complete package is more useful than approving the sleeve, tray and insert separately.
Frequently Asked Questions About Kraft Drawer Jewelry Boxes
What is a drawer-and-sleeve jewelry box?
It is a two-part package consisting of an outer sleeve and an inner sliding tray. The jewelry sits inside the tray and is revealed as the drawer is pulled outward.
Are drawer boxes suitable for rings?
Yes. A compact drawer box can hold a ring securely when the insert keeps the band upright and provides sufficient clearance around the setting.
Can bracelets be packaged in kraft drawer boxes?
Yes. Bracelet drawer boxes can be developed around fine chains, bangles, cuffs and charm bracelets. The tray proportions and insert should follow the shape of the bracelet.
How are necklaces held inside a drawer box?
Necklace inserts can guide the chain through attachment points while positioning the pendant in the main display area. Excess chain can be directed behind the insert to maintain a clean presentation.
Can several jewelry products use the same drawer box?
Some products can share an outer box size when their dimensions are compatible and different inserts provide the correct presentation. Standardization should not be used if it makes smaller jewelry look lost or larger pieces fit poorly.
Should the jewelry be tested inside the drawer before production?
Yes. Testing the actual product helps confirm tray fit, sleeve clearance, insert performance, drawer movement and product removal before production.
Build the Drawer Around the Jewelry
The value of kraft drawer and sleeve jewelry boxes comes from their ability to use one recognizable opening style across very different products.
The structure remains familiar: sleeve outside, sliding tray inside.
What changes is the engineering around the jewelry.
Rings need compact framing and vertical clearance. Bracelets need enough width to preserve their shape. Necklaces require a larger display area and controlled chain storage.
When those product-specific differences are addressed first, the exterior can become part of one coordinated packaging family.
The Customized Packaging develops custom kraft drawer jewelry boxes around your product dimensions, tray requirements, insert layout and branding. Share your ring, bracelet or necklace specifications to create a sleeve-and-tray structure designed around the jewelry inside.


